
Second-Hand Mini Excavator Undercarriage: Measuring Track Sag, Roller Wear, and Idler Hub Play in 30 Minutes
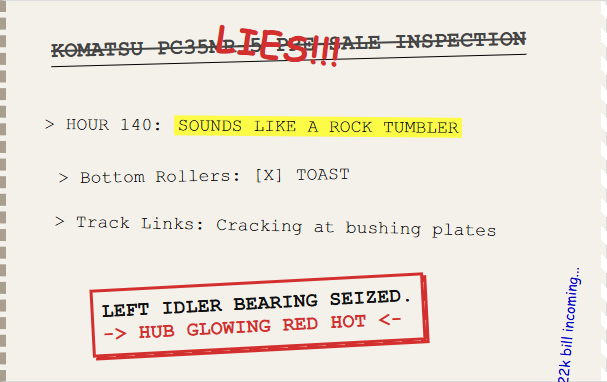
Last spring I purchased a 2019 Komatsu PC35MR-5 from a Municipal Contractor. I gave him the money due that afternoon. By hour 140 under my ownership, the undercarriage sounded like a rock tumbler. The bottom rollers were toast, track links were cracking at bushing plates and the left side idler bearing had seized so hard the hub was glowing. I retrieved the service records later which included a sheet for a pre-sale inspection.
Data sources for the table above:https://www.komatsu.com/en-za/products/parts/maintenance-tips
The Measurement Process
Dial Indicator Set-Up for Forensic Reading
Mount a magnetic base on the bottom frame of the undercarriage and zero the plunger against the top of the track link and apply your upward deflection force.
Cross-Reference With Other Metrics
Hooked Tooth Wear
Each of the teeth’s leading edge is curved backwards against the direction of rotation as the bushing is pounding into it cycle after cycle while under load.
Pitch Mismatch
When the sprocket wears or when a replacement chain is installed made with slight variations in chain pitch, cumulative error will result. In a gravel lot pitch mismatch cannot be measured with a tape measure.
Checking for Cracked Plates
To see if you have this, reach for the track that is at the top run of the machine and move it around from-side to side behind the sprocket.
Comparing Tooth Profile
Remove the sprocket cover (usually 4 bolts on most minis) and take a picture of the teeth where the 6 o’clock mark is in good light. Do this in contrast with new or low hour sprocket of the same model. The shape of the profile is transformed from a square trapezoid to a curved nub shape. When you hear that noise,”dragging a stick across a picket fence”, the bushings and teeth are no longer making good contact with each other.

Link Plate Cracking Sequence
When teeth wear it will decrease the depth of engagement. Fatigue stress is caused by flexing. Link fails. Track derails.
How to Perform the Play Test
Place both hands at the idler wheel locations (3 o’clock and 9 o’clock) and attempt to rock the wheel back and forth to make sure your radial play is good.
What Happens When the Seal Fails
When the seal does crack (all do eventually because they are subjected to track debris impact, temperature changes and UV), water and fine silt find their way into the grease. Grease emulsifies. Lubricity drops. The steel bearing elements begin to work on a paste, filled with dirt, rather than clean grease. Play increases. One day, while you are out traveling, the bearing seizes and the hub will freeze to the axle stub.
Real-Time Bearing Failure
I walked over and it was still idling and I can smell a bearing cooking. Put my back hand on the idler hub – couldn’t leave it on longer than a second or so. We turned it off and after 40 minutes we turned it back on; I pulled the hub, and the bearings cage was broken apart.
Field Example
Inspected it and it appeared to be all good. He didn’t perform the play idler test as there were no noises and the wheel was spinning freely. Hub locked, track derailed and the track adjuster cylinder broke off the mounting ear when making a sudden stop. Total repair: new bearing, new hub, new seal, new adjuster cylinder, and then labor to re-track in the field.
Seal Failure Diagnosis
Seal failure diagnosis–Tactile resistance: Rotate the idler wheel by hand to check. Should spin relatively free, but should have some friction on the seal lips. If it spins free as a bike wheel, then the seal has failed and the bearing is going to be dry. If it is notchy or gritty then contamination has already made its way in.
Axle Stub Wear
After a prolonged amount of time (hundreds of hours) the inner race of the bearing begins to pound on the stub if it has been running with excessive play.
The Invisible Wear Pattern You Can Only Catch With a Dial Indicator
As those flanges wear down, the track begins to “walk” side-to-side while under load which in turn puts unnatural wear on all other parts of the system and can result in derailment.
Measuring Flange Taper
The preparation for the flange taper measurement: You require a magnetic-base dial indicator, a flat reference surface (undercarriage frame) and patience. The mud on the roller flange needs to be cleaned with wire brush since much mud will put you off a millimetre. Place the mag base on the frame and adjust the mag indicator plunger so that it is perpendicular to the flange face and zero it against the wheel inboard of the flange root. Push the plunger tip up the face of the flange towards the outer edge of the flange. The taper will be indicated on the indicator.
Bottom Rollers vs Top Carriers
Acceptable Wear Limits
The track can climb up from the flange in a hard turn or pivot and once the track is off the wheel either it derails, or it slams back onto the wheel hard enough to cause the flange base to break.
Determining Wear Sequence
Roller Shaft Seal
As the seal gets older it becomes hard. The roller bearing begins to dry out, friction increases, heat increases and the bearing cage begins to fall apart. This will be seen as a brownish-red weep stain on the inner face of the roller, at the connecting point to the shaft.